

















OpenAI / ChatGPT Ads for PrestaShop
Product feed, measurement pixel and Conversions API
Step 2 — Guided setup (the wizard)
The start screen
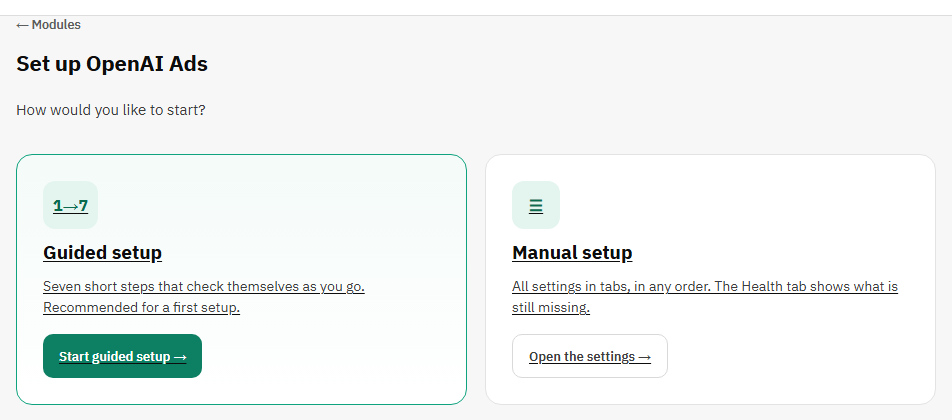
The first time you click Configure on a new installation, the module asks how you want to start. Guided setup opens the wizard: seven short steps, one job each, that check themselves as you go. Manual setup opens the settings tabs, where you fill in everything in any order and the Health tab shows what is still missing. Both lead to the same settings; you can switch at any time. Once you have chosen, Configure opens your setup directly.
What the wizard does
The wizard takes you from install to events flowing and a feed OpenAI accepts. Every answer is saved the moment you confirm it, each step checks its own work where you type it, and the last step lists the real state of the whole setup. You can open any step from the stepper at the top in any order, and Next is never locked: a step you leave unfinished is simply listed on the last step. You can leave at any time and come back; nothing is lost.
How every row works
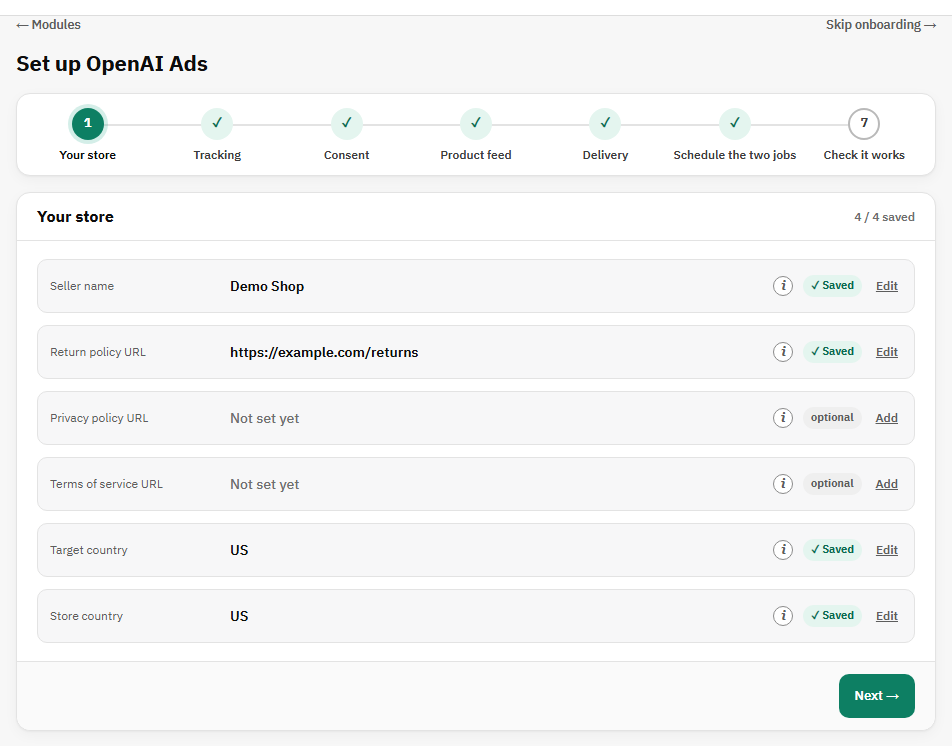
- A saved setting shows its value, ✓ Saved and Edit. Click Edit to change it; only one row is open at a time.
- Type the value and click Save, or press Enter. Esc or Cancel closes the row without saving.
- If a value is refused (for example a URL that does not start with http:// or https://), what you typed stays in the field and one sentence under it says why.
- Choices are buttons, and every choice starts with a sensible answer already selected, so a step never waits for a click it does not need.
- The (i) next to a label shows a one-line tip; it closes by itself after a moment. Some rows also offer How do I find this?, which explains where the value comes from.
- Instructions (for example where to paste the feed URL in Ads Manager) are shown as notes with an Open button; there is nothing to tick. Tasks that change what a step accepts have a Save button, and Undo unticks them.
- The CAPI token and the SFTP password are stored encrypted and always shown masked. To replace one, click Edit and paste the new value.
The seven steps
| Step | What you do | How it is checked |
|---|---|---|
| 1. Your store | Seller name (prefilled with your shop name), Return policy URL, Target country and Store country (both prefilled with your default country). The return, privacy and terms links can each be a CMS page of your shop or a URL. | The return policy must be a web address or a CMS page. Done when all four are saved. |
| 2. Tracking | Copy the Pixel ID from Ads Manager, then the CAPI token. | Send test event asks OpenAI to validate a sample event without recording it. Done when the Pixel ID is saved and the test is accepted, when you skip the Conversions API, or when you use Skip this step. |
| 3. Consent | Choose No consent banner on this store, I use a consent banner or Decide later. With a banner, give its cookie name, its JavaScript expression, or both. | Check now and Try it on the storefront (below). Done when a choice is saved; the checks are optional. |
| 4. Product feed | Feed setup (Simple or Advanced), which products, the out-of-stock choices and how combinations are named. Every choice is preselected. | Build the feed now builds the file, reports how many products it wrote and then shows the count and View list. Done when a build wrote at least one product, or when you use Skip this step. |
| 5. Delivery | Hosted URL (preselected) or SFTP, then the rows for that method. The hosted feed starts with No password. | Check the URL answers (hosted) or Test connection (SFTP). Done when the check passes. |
| 6. Schedule the two jobs | Copy the two job URLs, or the ready-made crontab lines, into your scheduler or the PrestaShop Cron Jobs module. | Run now runs a job on the spot. Each job shows its URL, its crontab line and when your scheduler last called it, refreshed every 30 seconds. You may continue before the first call; the last step reminds you. |
| 7. Check it works | Read the list; follow Fix → on any line that is not ticked. | Checks that never ran start by themselves. Re-run checks refreshes the list. Save and finish finishes the setup and opens the settings tabs. |
Three answers switch things on for you: saving a Pixel ID turns tracking on, saving a CAPI token turns the Conversions API on, and a build that writes products turns the feed on. No check changes any other setting.
Skipping a step
The Tracking and Product feed steps have a Skip this step button next to Next. It turns that part off (tracking, or the feed) and moves on; the step then counts as done and the last step shows it as a warning, not an error. Undo on the step, or On in the settings, brings it back. A step you simply leave unfinished stays as it is and appears on the last step.
Step 2 of 7 — Tracking
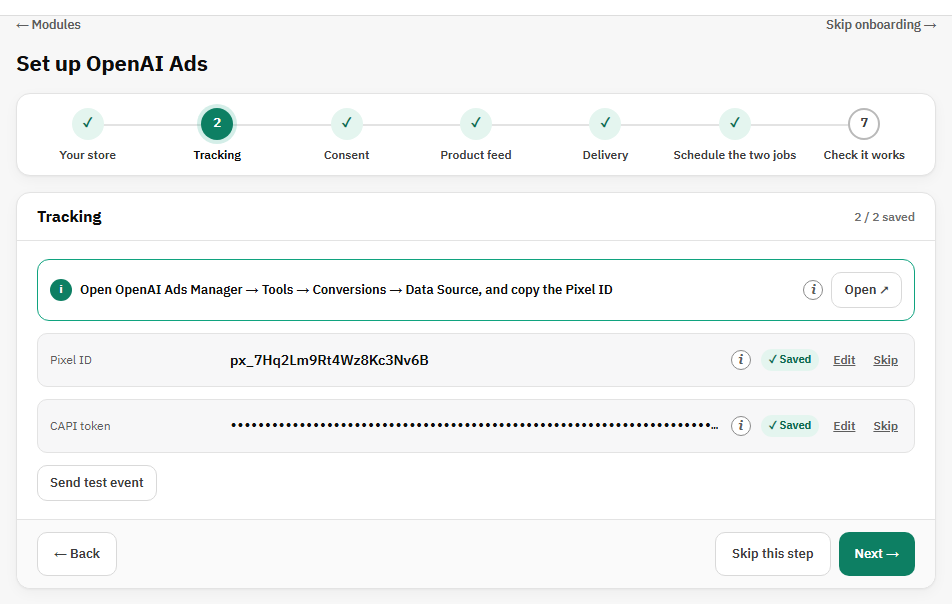
The Pixel ID is the minimum needed to start measuring: until it is saved, the module renders nothing on your storefront. The CAPI token authenticates the server-side channel that survives ad blockers. If you do not have the token yet, skip the Conversions API: the pixel still tracks, the Conversions API stays off, and the last step shows it as a warning until you add the token in the Tracking tab. Replacing the token later changes neither the job URLs nor the hosted feed password.
Step 3 of 7 — Consent
This answer decides when a hashed email and customer ID may be attached to an event. With No consent banner on this store, every event carries the data OpenAI needs for matching. With I use a consent banner, customer data is sent only after the shopper accepts. Decide later keeps sending events, without customer data, until you choose.
With a banner, enter the name of the cookie your consent tool sets. A value of 1, true, yes, granted or allow counts as consent, and so does a Cookiebot (CookieConsent), OneTrust (OptanonConsent, Targeting group C0004) or JSON cookie that marks marketing as accepted. Check now reads that cookie from your own browser, so accept the banner on your storefront in the same browser first. The JavaScript expression (for example window.Cookiebot && Cookiebot.consent.marketing) is the alternative for tools that do not set a readable cookie; Try it on the storefront opens your shop with an overlay that shows whether the expression is true or false, or the error if it fails. Nothing is sent to OpenAI by that test.
Step 4 of 7 — Product feed
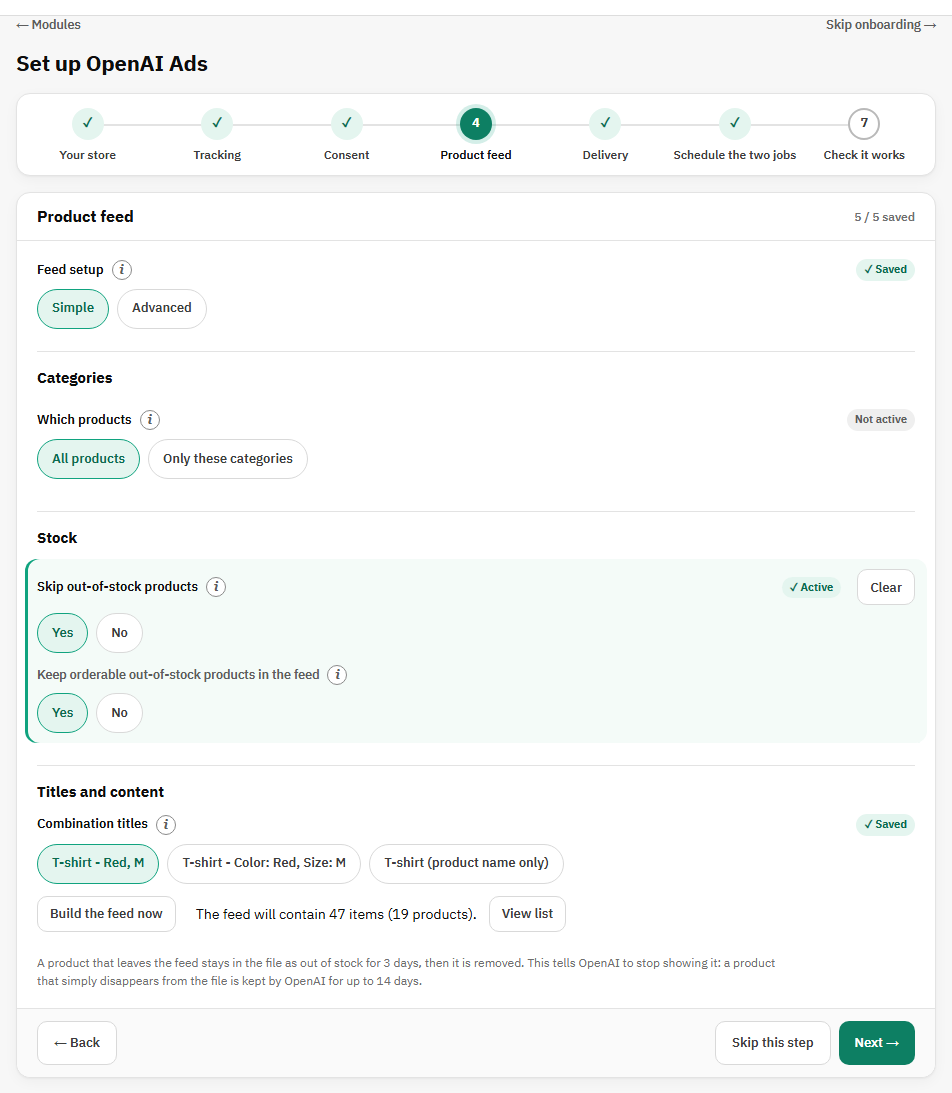
The feed is rebuilt on schedule from your live catalog, one line per sellable product and per combination. Feed setup chooses Simple, which covers what most stores need, or Advanced, which adds filters by brand, supplier, feature, attribute, price, stock, discount and individual product (section 6 describes them). Switching never changes a value.
| Field | What it does and why it is needed |
|---|---|
| Which products | All products (preselected), or Only these categories: a category tree opens, with the number of products beside each category. Subcategories are not implied, so tick them explicitly. |
| Skip out-of-stock products | Yes leaves out products with no stock that cannot be ordered, so you do not pay for clicks on something nobody can buy. No lists them as out of stock, which OpenAI accepts but does not advertise. A product left on “Use default behavior” follows your shop's out-of-stock setting. |
| Keep orderable out-of-stock products in the feed | Shown when Skip is Yes, inside the same block. Yes keeps the out-of-stock products you still accept orders for, marked as backorder. |
| Combination titles | How a combination is named in the feed, so each variant has its own title: T-shirt - Red, M (the default), T-shirt - Color: Red, Size: M, or the product name only. |
Build the feed now builds the file and reports how many products it wrote. From then on the step shows how many items and products the feed will contain, with a View list button (section 6). A build that writes zero products names the likely cause: the category choice or the out-of-stock setting.
Step 5 of 7 — Delivery
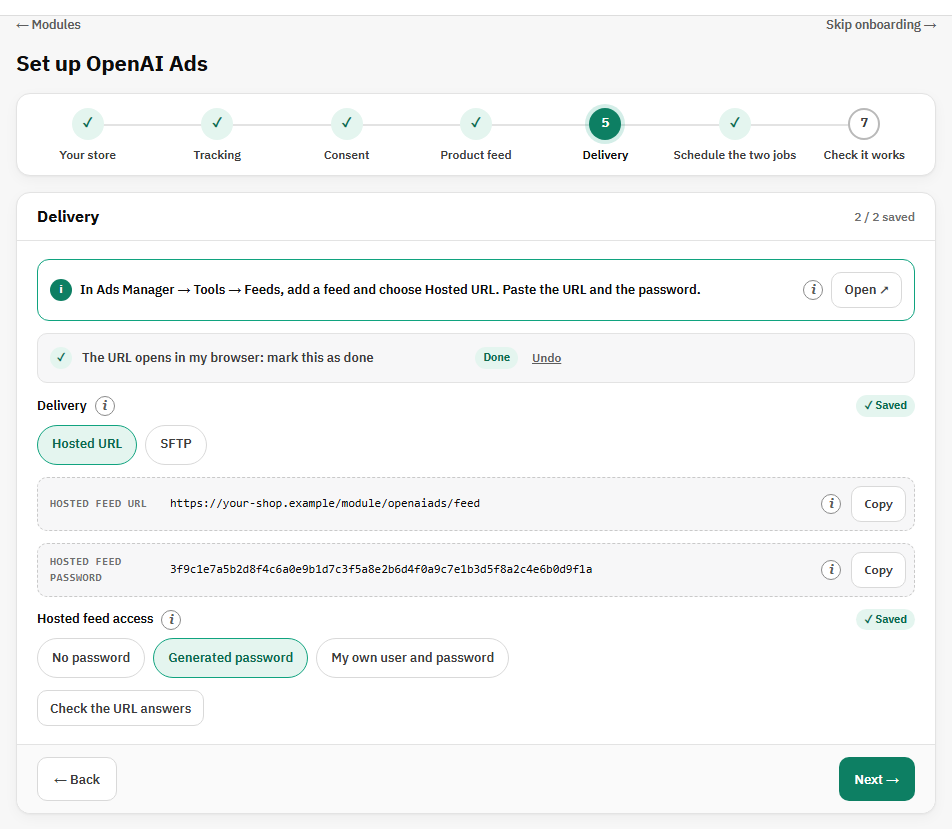
| Hosted URL (preselected, simplest) | OpenAI fetches the file from your store on its own schedule. Copy the Hosted feed URL, then in Ads Manager → Tools → Feeds add a feed, choose Hosted URL and paste it. Hosted feed access starts with No password, which works with every host; choose Generated password (any username, the password shown) or My own user and password if you want the URL protected. Set the import schedule in Ads Manager and run the feed job at least as often. Check the URL answers fetches the URL from your server the way OpenAI will and expects the compressed feed file. |
|---|---|
| SFTP (the module uploads) | In Ads Manager → Tools → Feeds add a feed and choose SFTP connection; copy the host, port, user and password it shows into the four rows. Test connection logs in and looks at the folder without uploading anything; an account that may upload but not list is normal and passes. After that, every feed job uploads the new file atomically, and a failed upload leaves OpenAI's last good file untouched. |
Step 6 of 7 — Schedule the two jobs
The feed job rebuilds the feed and, with SFTP, uploads it; once a day is usually enough. The events job sends queued conversions to OpenAI; run it every 5 minutes, because until it runs purchases stay queued. Each job has its own block with its URL, its crontab line, its status and a Run now button. Run now proves that a job works; the status line proves that your scheduler really reaches its URL. Section 7 explains the two jobs in more detail.
Step 7 of 7 — Check it works
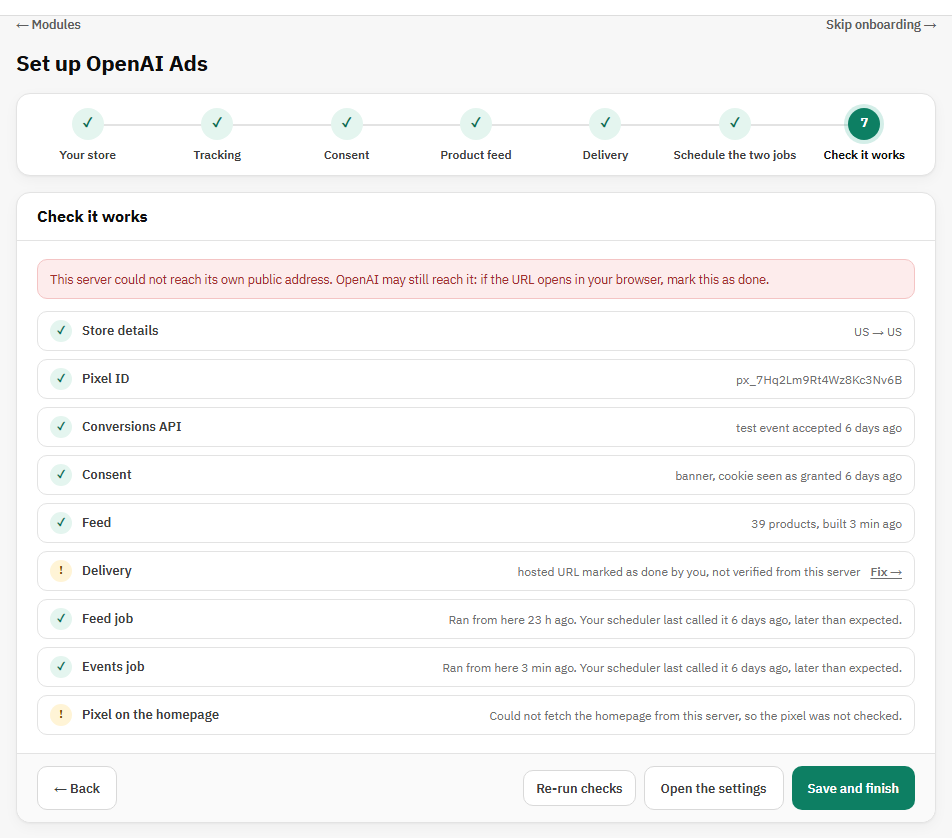
When the step opens, every check that never ran starts by itself in the background, one after the other, as if you had pressed its button: the feed build, the hosted URL check or the SFTP login, the test event, the homepage check, and Run now for a job that is not ticked. A note says so while they run, and the page stays usable. A step you skipped is not checked.
| Store details | Seller name, return policy and both countries are saved. |
|---|---|
| Pixel ID | A Pixel ID is saved. A warning when tracking was skipped. |
| Conversions API | A test event was accepted. A warning when you skipped it or never tested. |
| Consent | Your choice, and for a banner whether its cookie was ever seen as granted. Decide later is a warning. |
| Feed | The last build and how many products it wrote. A warning when the feed step was skipped. |
| Delivery | The hosted URL answered, or the SFTP login succeeded. |
| Feed job / Events job | When your scheduler last called the job: ✓ within 26 hours for the feed and 30 minutes for events, a warning when older, ✗ when never. A job run from this screen shows ✓ “Ran from here”, and says that your scheduler has not called it yet. |
| Pixel on the homepage | Your server fetches the homepage and looks for the pixel loader with your Pixel ID. Needs the server to reach its own public address; when it cannot, the line is a warning that says so. |
Save and finish is always available: it marks the setup as finished and from then on Configure opens the settings tabs. Open the settings leaves the wizard without finishing it.
Leaving and coming back
Skip onboarding, at the top right of every step, opens the settings tabs at once. If you started the guided setup and did not finish it, the settings show a “Setup not finished” banner whose Continue setup button returns to the wizard. Run guided setup, above the tabs, opens the wizard again at any time and never resets a value.